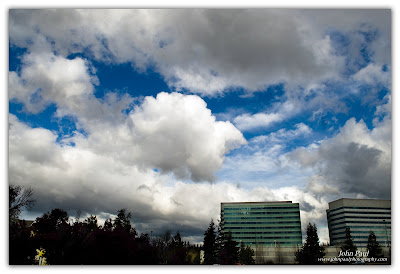
Thursday, April 30, 2009

JPP Daily Photo


Here's some photos I took of Paul from work. I needed the practice for my headshot photo technique. He needed some photos for his facebook and stuff.

Photo Tips/Settings:
Ari was nice enough to provide her studio lights that we used in a corporate meeting room. I believe I shot mostly at 1/60 - 1/80 sec @ f/2.8 thru f/5.6 ISO 100 with a main light and hair light.

JP

Wednesday, April 29, 2009

JPP Daily Photo


And more photos from the Fashion show...!

jp

Monday, April 27, 2009

Sneak Peek Fashion Show Photos


Here's a few....
Photo Tips/Settings: Shot with both 18-50mm f/2.8 and 85mm f/1.4 on my Nikon D200. Camera set to manual mode with on average 1/30 thru 1/80 secs at f/1.4 and f/2.8. Used Lightroom 2.0 to adjust white balance and exposure.

JP

Friday, April 24, 2009

Photographer Social Network site

Here's another photographer site. Its kind of a cross of Myspace/Facebook for Photographers.

http://www.picturesocial.com/

JP

JPP's Daily Photo


Hi all,

I've been amiss with my daily photos and the blog too. I plan on running a new photo of the week submissions next week. So please send me your favorite photos!
Here are some photos I took this week, I actually did take a few!

Photo Settings/Tip:

Photo# 1 - I saw this gorgeous rose today. I decided to take 6 different photos from different angle (180 degress) just to see what the lighting and shadows would look like. I ended up choosing the first one. Edited in Photoshop. Added TDW no glow action for that final look.

Photo# 2 - Since the weather has been so nice, I took my Honda Element to the car wash. Literally after it was finished drying, I popped out the ol' Nikon D200. Decided to use the 17-50mm and get close enough to get a wide angle shot. Ari from work helped me edit in Photoshop with highpass editing to give it an HDR look.

JP

Thursday, April 23, 2009

Photography Social site

A colleague of mine told me about a cool website for Printroom photographers. Its kind of like Facebook for Printroom photographers.

http://photoconia.com/

JP

Tuesday, April 21, 2009

JPP's Daily Photo


Here's some photos that I edited from this past weekend's big wedding of Gena & Shaun.
This should count as 2 entries for my daily photos.
JP

Friday, April 17, 2009

JPP's Daily Photo


This is one of favorite photos of all times. I took it the last time I went to Yosemite. =)


JP

Thursday, April 16, 2009

JPP's Daily Photo


Nikon announced this week the new D5000 in their arsenal of Digital SLRs. One of the new features Silhouette mode. Well some of us have been shooting silhouette mode for years. So we don't need a pre-made setting to capture this type of photos. Here's one I took this week during the windy weather.

Photo Tip/Technique settings: I believe I left this at Aperture mode on my Nikon D200 and 55-200mm VR lens.

JP

Wednesday, April 15, 2009

JPP's Daily Photo


It was sooo windy yesterday, I decided to stick the camera out of the car for some moving shots!

Photo Tip/Settings: P mode (again), Tamron 17-50mm f/2.8 lens in jpeg format. Driving safely with one hand and the other hand shooting out the car window! lol.

JP

JPP Video Tutorial #4

This one is about using masking layers and saturation.

JP

Tuesday, April 14, 2009

Last Week's Winner of the Photo-of-the-Week contest


Congratulations to Tracy of tracysmiles.printroom.com for winning last week's JPP Photo-of-the-Week contest! Her winning image was "Lily." Tracy will be receiving a free professional 8x10 Print in 13x16 Frame (black or white double mat).

Please send in your favorite photos by Wed 4/15 for submission in this week's contest. Next week's winner will receive the 13x16 frame plus a USB memory stick. You can email me your image(s) directly. Just include the image and image title.

Thanks again for everyone's participation.

Cheers,
John Paul David
http://www.johnpaulphotography.com/
(408) 931-0887

JPP Daily Photo: Another Fruit Case! (Pun intended)


Looking at last Friday's daily photo of a fruit bowl, I thought the photo was decent. It was taken indoor ambient lights (fluorescent I believe) and some photoshop editing. Well here's the similar fruit bowl setup but now using flash photography.

Photo Tips/Settings: Same setup as last Friday's. Using P Mode and i-TTL on my SB600 external flash attached to my D200 shoe. As usual right out of the camera jpeg on the first photo, basic curves/masking layer adjustment saturation on the second photo and lastly adding snap! action to make the third image.

Which one do you like the most?

JP

Monday, April 13, 2009

Happy Easter!


Here's some photos of my youngest niece at yesterday's Easter Egg Hunt at San Jose's Rose Garden. The story goes like this: my niece would "find" the hidden eggs. Gather them all up in her basket. Walk a few feet away and dump the whole basket on the grass. She did this like 5 or 6 time in front of the whole family. It was funny the first couple times but after the 6th time, it was time to call it quits!

Photo Tip/Settings: I cheated, i left everything on P mode with my SB600 used as fill flash in i-TTL mode.

JP

Friday, April 10, 2009

JPP's Daily Photo


This blog entry is for my good friend, Tracy. As many of you know by now, I received my Tamron AF 17-50mm f/2.8 IF lens from B&H this week (you can order one here). Well I've been busy taking all kinds of photos with it for the last few days. My favorite photo of the bunch is bowl of fruits I took a photo with today. I think it really demonstrates the color quality and sharpness of this lens. Based on my experience so far, I highly recommend this super wide angle lens for anyone who shoots with the Nikon system but is on a budget (i.e. they cant afford the equivalent Nikkor lens at over $1000.00 US).

Photo Technique/Setup:
1. Setup a simple backdrop in my cubicle at work using 3 large prints but using the black colored back sides. The purpose was to minimize any reflection from flash and also have a solid, dark background.
2. The First image shot at ISO-400 P Mode 50mm 1/8 sec with +1 EV.
3. The Second image shot at ISO-400 Manual Mode @ 50mm 1/25 sec with +1 EV.
4. The Third image shows my simple background and lighting setup.
5. Use Lightroom 2.0 to process RAW files to jpeg. Minor White Balance and Exposure editing.
6. In the Last image I used PS4 to auto color and edit mask layer for saturation (in order to make the the reds and yellow colors "pop").

JP

Thursday, April 9, 2009

JP's Daily Photo - HDR


While taking some photos on my lunch break, I decided to do some bracketing shooting on my D200 and my new Tamron 18-50 f/2.8 lens so I could experiment with HDR images.

Photo Technique/Settings: I ended up shooting 9 consecutive photos with 1 EV. I merged them using Lightroom 2.0 and Photoshop CS4 process. Once I had an acceptable image, I flattened and saved as jpeg. Next I used an evaluation HDR software called Photomatix Pro 3.0 which has an easier work flow for merging HDR photos. After running their process, I saved the file as jpeg. Lastly I took the Photomatix Pro version of the HDR image and edited in Photoshop using Masking Layers to touch up the files (specifically the clouds, in the non-Photoshop version the clouds had no detail and were blown out). The three images you see are the original, Adobe LR2/CS4 version and the Photomatix Pro 3 version. Let me know what you think.

JP

Basic Photography Skills

I was perusing Ken Rockwell's excellent photography website when I came across a couple of links to what I call his "basis photography" skills. I'm reading it. And i will re-read it because it has some very important, basic skills every photographer should know.

http://www.kenrockwell.com/tech/camera-adjustments.htm

http://kenrockwell.com/tech/lighting.htm

http://www.kenrockwell.com/tech.htm

My favorite because I'm still learning studio lighting is this article http://www.kenrockwell.com/tech/strobes.htm

-JP

P.S. Ken's a bit of a Nikon nut while has some criticism for Canon. =)

JPP's Daily Photo


Here's the image I took from yesterday while driving home. I noticed there was a nice yellow sun that was moving between two banks of clouds. In fact, yesterday was pretty rainy and overcast for Silicon Valley. I decided to try to take some photos driving of the weather outside the car. I finally stopped near a church by my home to take a couple quick snapshots.

Photo Tips/Settings: Manual mode. Minimal Lightroom and Photoshop editing other than levels/curves.

JP

Wednesday, April 8, 2009

Submissions for this week (Full Gallery)

Vote for your favorite JPP Photo-of-the-Week!

The voting poll is live. Please vote for your favorite photos!

JP

Tuesday, April 7, 2009

JP's Daily Photo


Here's the image I took today. My friend Ariana showed me how to use mask layers to edit the image. I selectively edit the curves, levels and exposure.


Thanks to Ari for again showing me the advantages of using masking layers. I'm a born-again Photoshop users!


JP

Another Award Winning Video Tutorial from JPP!

This short video shows how to remove those annoying dust spots, or as I call them, "Dust Bunnies!!" And, no, not the cute kind like Bugs Bunny or the Easter Bunny. =P

JP

New Feature on my Blog


In order to improve my photography skills, I've decided to take at least one new picture a day. I will post it on the blog with either: (1) technique / settings used (2) any post processing and/or (3) strait out of the camera if no editing needed.

Photo Tip: Here's one of the photos I took on my break yesterday.


This was taken with my Nikon D200 and Nikkor 55-200mm VR lens. Since it was a pretty sunny day, I applied the Sunny F16 rule. I set my camera to Manual. Zoomed in at 200mm. Aperture set to F/14. Exposure Comp was 1/3. Afterwards I edited the raw file in Lightroom 2.0. Left White Balance as Shot Taken. Added some vibrancy and Landscape Sharpening. Voila! One instant flower shot!

JP

Monday, April 6, 2009

John Paul Photography's Photo-of-the-Week Contest Winner Announcement‏‏

Congratulations to Lindsay of L.M.K. Photography & Design for winning last week's JPP Photo-of-the-Week contest! Her winning image was "Color Baby." Lindsay will be receiving a free professional 8x10 Print in 13x16 Frame (black or white double mat).

The runner up, Kris of Curlybearproductions, will get a free 8x10 print.

Please send in your favorite photos by Wed 4/08 for submission in this week's contest.

Thanks again for everyone's participation.

And for those of you who have not entered, its never too late to enter this week's contest. =)

JP